The Problem with Resource-Based Scaling
In cloud-native architectures, managing resource allocation efficiently is a delicate balance between cost and performance. Traditional Kubernetes scaling relies on the native Horizontal Pod Autoscaler (HPA), which monitors metrics such as:
- CPU Utilization: Scaling up only after CPU consumption crosses a specific threshold.
- Memory Consumption: Scaling pods when memory footprints expand, which is often a lagging indicator of load.
This resource-based approach introduces several severe operational problems:
- Laggy Responses: By the time a sudden burst of incoming messages spikes CPU usage enough to trigger an HPA scale-up event, your message broker or API gateway may already be overwhelmed, causing severe latency or timeouts.
- Inability to Scale to Zero: Native HPA cannot scale a deployment to 0 replicas. Even during hours of absolute inactivity, you must keep at least one pod running, incurring continuous idle-compute billing.
- Over-Provisioning Waste: To handle sudden traffic spikes without lag, teams often over-provision their base CPU and memory reservations, dramatically inflating their public cloud invoice.
To build a truly reactive and cost-efficient cluster, you must scale your workloads based on the actual demand signals—such as queue depth, database rows, or incoming HTTP request metrics—rather than the hardware symptoms of that load.
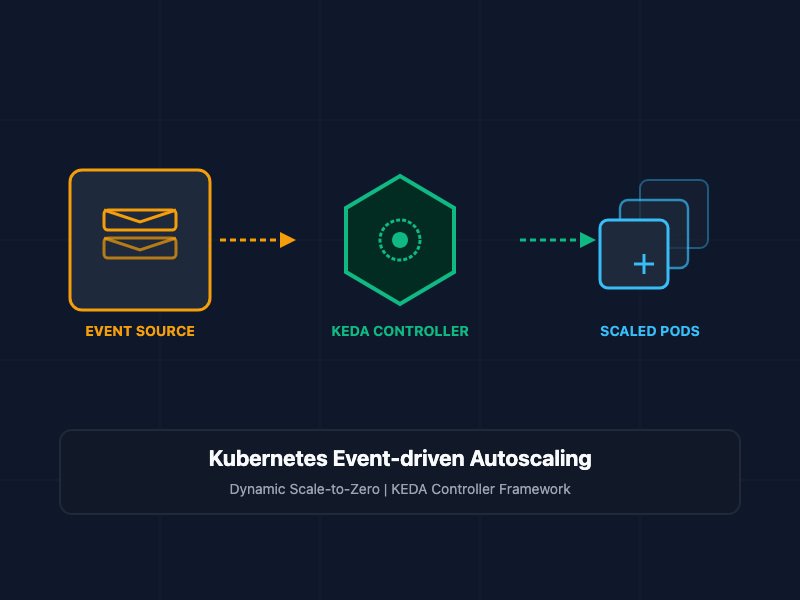
What Is KEDA?
KEDA (Kubernetes Event-driven Autoscaling) is a single-purpose, lightweight component that can be added to any Kubernetes cluster. It extends the native HPA capabilities by integrating custom resource definitions (CRDs) with over 60 external event sources, or "scalers" (including RabbitMQ, Apache Kafka, Prometheus, PostgreSQL, and AWS SQS).
Instead of waiting for CPU metrics to spike, KEDA continuously polls your event source. When a queue builds up, KEDA dynamically handles the scale-up from 0 to 1 replica, and then delegates the standard scaling metrics to the native HPA to scale from 1 to N. Once the queue is completely drained, KEDA safely handles the scale-down back to 0.
Core Concepts and Implementation
1. The Target Deployment
To implement event-driven scaling, we first define a standard Kubernetes deployment for our queue worker. This worker is designed to pull and process tasks from a RabbitMQ queue named transactions.
apiVersion: apps/v1
kind: Deployment
metadata:
  name: order-processor
  namespace: processing
spec:
  replicas: 1 # KEDA will dynamically override this value
  selector:
    matchLabels:
      app: order-processor
  template:
    metadata:
      labels:
        app: order-processor
    spec:
      containers:
      - name: worker
        image: internal-registry.net/billing/worker:v1.2.0
        resources:
          requests:
            cpu: "100m"
            memory: "128Mi"
          limits:
            cpu: "300m"
            memory: "256Mi"
        env:
        - name: RABBITMQ_HOST
          value: "rabbitmq-service.message-broker.svc.cluster.local"
2. The KEDA ScaledObject Configuration
To drive the deployment scaling using our RabbitMQ queue depth, we define a KEDA ScaledObject. This CRD maps our target deployment to the RabbitMQ scaler and specifies our polling frequencies, cooldown periods, and target queue thresholds.
apiVersion: keda.sh/v1alpha1
kind: ScaledObject
metadata:
  name: order-processor-scaler
  namespace: processing
spec:
  scaleTargetRef:
    apiVersion: apps/v1
    kind: Deployment
    name: order-processor # Must match the Deployment name above
  pollingInterval: 15 # Interval in seconds to poll RabbitMQ
  cooldownPeriod:  300 # Wait time in seconds before scaling back to 0
  minReplicaCount: 0 # Enable scaling to absolute zero to save costs
  maxReplicaCount: 20 # Protect against budget overruns during anomalies
  advanced:
    horizontalPodAutoscalerConfig:
      behavior:
        scaleUp:
          stabilizationWindowSeconds: 0
          policies:
          - type: Percent
            value: 100
            periodSeconds: 15
  triggers:
  - type: rabbitmq
    metadata:
      queueName: transactions
      queueLength: "5" # Target value: 1 pod per 5 messages in the queue
      host: amqp://guest:guest@rabbitmq-service.message-broker.svc.cluster.local:5672 //
In this configuration, if there are 0 messages in the transactions queue, KEDA scales the order-processor deployment to 0. If 15 messages arrive, KEDA immediately scales the workload up to 3 pods to distribute and process the load rapidly, scaling back to 0 after the queue remains empty for 5 minutes (300 seconds).
Cost Optimization and FinOps Benefits
By utilizing KEDA alongside a modern cloud autoscaling engine (such as Karpenter or standard Cluster Autoscaling), you achieve a highly optimized FinOps lifecycle:
- Pod Scale-to-Zero: KEDA terminates all replicas of idle deployment worker pods.
- Node Scale-to-Zero: When pods are terminated, the underlying Kubernetes nodes become empty. Karpenter detects the underutilized nodes, safely drains them, and terminates the corresponding EC2 or virtual machine instances.
- Budget Safety Nets: By defining explicit maxReplicaCount properties, SREs prevent resource consumption runaway if an upstream system malfunctions and floods a queue with invalid or unprocessable tasks.
SRE and Architectural Best Practices
- Set Realistic Cooldown Periods: Avoid setting your cooldownPeriod too short. If workloads scale down to 0 too rapidly, frequent cold-starts (container pull and initialization times) can introduce latency when new messages arrive.
- Implement Dead-Letter Queues (DLQ): Ensure your queue consumers route unprocessable "poison-pill" messages to a dedicated DLQ. Otherwise, failing messages will remain in the primary queue, causing KEDA to continuously scale up workloads to process invalid data.
- Tune Polling Intervals: For extremely active queues, set aggressive polling intervals (e.g., 5 to 10 seconds). For low-priority tasks, extend the interval to 30 or 60 seconds to reduce the query overhead on your message broker or monitoring database.
- Set Container Resource Limits: Always declare explicit CPU and memory limits on your worker deployments to ensure that when KEDA scales workloads up to your maximum replica count, they do not exceed cluster node capacities.
Getting Started
To install KEDA and deploy your first event-driven scaling pipeline:
# Step 1: Add the Helm repository for KEDA
helm repo add kedacore [https://kedacore.github.io/charts](https://kedacore.github.io/charts)
helm repo update

# Step 2: Install KEDA inside your cluster in its own namespace
helm install keda kedacore/keda --namespace keda --create-namespace

# Step 3: Deploy your target worker application and apply the ScaledObject
kubectl apply -f deployment.yaml
kubectl apply -f scaled-object.yaml

# Step 4: Monitor the real-time scaling events
watch kubectl get pods -n processing
By leveraging KEDA's reactive event-driven scaling, you eliminate manual provisioning overhead, ensure your workloads instantly adapt to transactional demands, and only pay for computing power when actual data is being processed.


