

The Problem: AI Terminal Agents Without Workflows
Autonomous terminal agents like Claude Code have transformed modern software development. However, running an AI agent directly inside your terminal without structured workflows leads to common developer friction points:
- Context Fragmentation: Without persistent rules, you find yourself re-prompting the AI on build tools, testing commands, and coding conventions every session.
- Uncontrolled Execution: Granting an agent raw terminal access without guardrails risks accidental file overwrites, exposed secrets, or unsafe shell executions.
- Workflow Inconsistency: Team members prompt the agent differently, producing fragmented code formatting and unstandardized Git commit histories.
- Token Overuse: Unstructured conversations exhaust token windows quickly, forcing frequent context resets and slowing down development momentum.
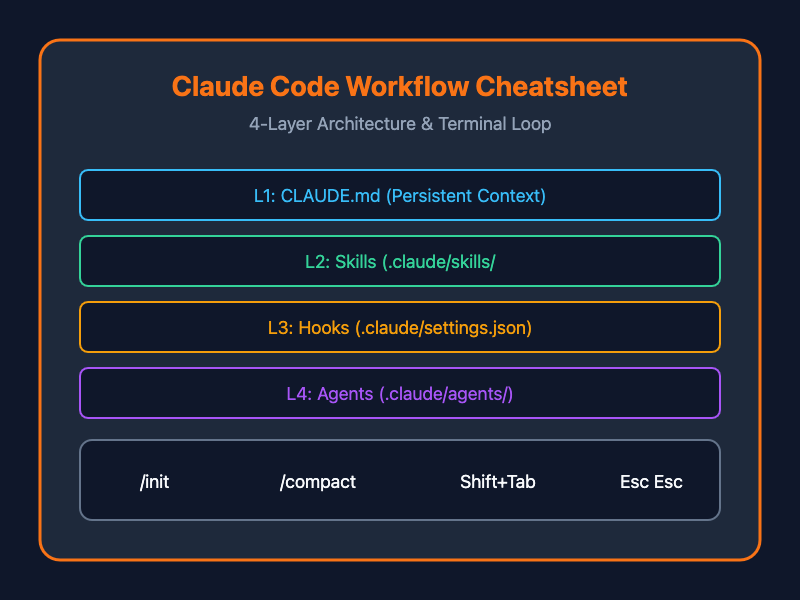
Adopting the 4-Layer Claude Code Architecture—spanning persistent memory (CLAUDE.md), auto-invoked skills (.claude/skills/), deterministic hooks (.claude/settings.json), and dedicated subagents—turns Claude Code into a predictable, high-performance CLI pair programmer.
The 4-Layer Claude Code Architecture
To get the most out of Claude Code, structure your environment into four distinct operational layers:
+-----------------------------------------------------------------------+
|  Layer 4: Agents        | Subagents with dedicated, isolated context  |
+-----------------------------------------------------------------------+
|  Layer 3: Hooks         | Deterministic callbacks & safety gates  |
+-----------------------------------------------------------------------+
|  Layer 2: Skills        | Auto-invoked markdown knowledge packs       |
+-----------------------------------------------------------------------+
|  Layer 1: CLAUDE.md     | Persistent project memory & architecture    |
+-----------------------------------------------------------------------+
- Layer 1 (CLAUDE.md): Persistent context and global rules automatically loaded at the start of every session.
- Layer 2 (Skills): Modular, auto-invoked knowledge packages that guide Claude on repetitive tasks like code reviews, testing patterns, or deployments.
- Layer 3 (Hooks): Automated safety gates and shell callbacks that run before or after tool executions.
- Layer 4 (Agents): Specialized subagents configured with isolated prompts and custom scopes for targeted jobs.
Step 1: Getting Started & Memory Hierarchy
Installation & Project Initialization
Install Claude Code globally (requires Node.js 18+) and initialize your repository memory:
# Install Claude Code CLI
curl -fsSL https://claude.ai/install.sh | bash

# Navigate to project and initialize memory
cd your-project
claude /init
Running claude /init automatically scans your directory, detects tech stacks, build tools, and test runners, and generates a starter CLAUDE.md memory file.
The Memory File Hierarchy
Claude Code resolves memory hierarchically across global, repository, and directory levels:
~/.claude/CLAUDE.md        --> Global rules (applies across all user projects)
~/monorepo/CLAUDE.md       --> Parent root memory (monorepo settings)
./CLAUDE.md                --> Project root memory (committed to Git)
./frontend/CLAUDE.md       --> Subfolder context (scoped to specific module)
Memory Scoping Rules:
- Keep each CLAUDE.md file under 200 lines to conserve context tokens.
- Subfolder memory files append context dynamically when operating inside that folder.
- Subfolder instructions never overwrite parent context—they extend it.
Step 2: Structuring CLAUDE.md
CLAUDE.md acts as Claude's persistent brain. Structure it around three key questions: What, Why, and How.
# Project: MyApp
FastAPI REST API + React SPA + PostgreSQL

## Commands
- Dev: `npm run dev`
- Test: `npm run test`
- Lint: `npm run lint`

## Architecture
- `/app` -> Next.js App Router pages
- `/lib` -> Shared utility modules
- `/prisma` -> DB schema & migrations

## Gotchas & Rules
- Always use Zod schemas for request validation.
- Never write inline SQL; use Prisma client helpers.
- Run `npm run lint` before committing changes.
Step 3: Adding Skills (.claude/skills/)
Skills are reusable Markdown instruction sets that Claude auto-invokes when relevant user intent is detected.
Directory Blueprint
your-project/
├── CLAUDE.md
├── .claude/
│   ├── settings.json
│   ├── settings.local.json
│   ├── skills/
│   │   ├── code-review/
│   │   │   └── SKILL.md
│   │   └── testing/
│   │       └── SKILL.md
│   ├── commands/
│   │   └── deploy.md
│   └── agents/
│       └── security-reviewer.md
└── src/
Skill Example (.claude/skills/testing/SKILL.md)
The description field in the frontmatter is critical—it tells Claude when to activate the skill automatically.
---
name: testing-patterns
description: Jest and Vitest unit testing patterns for React and Express.
allowed-tools: ["Read", "Grep", "Glob"]
---

# Testing Patterns Guide

When writing tests:
1. Follow the Arrange-Act-Assert (AAA) pattern.
2. Place test files in `tests/unit/` mirroring the source directory.
3. Use factory functions for mock user payloads rather than hardcoded objects.
Top Skill Ideas for AI Engineering Teams
- code-review: Code quality checks, linting enforcement, and security auditing.
- testing-patterns: AAA testing patterns and mock definitions.
- commit-messages: Conventional Commit formatting guidelines.
- docker-deploy: Container image build routines and health check validations.
- api-design: OpenAPI schema checks and REST payload conventions.
Step 4: Setting Up Hooks & Permission Guardrails
Hooks provide deterministic pre-execution and post-execution callbacks inside .claude/settings.json.
Configuring Hooks (.claude/settings.json)
{
  "hooks": {
    "PreToolUse": [
      {
        "matcher": "Bash",
        "hooks": [
          {
            "type": "command",
            "command": "scripts/security-check.sh",
            "timeout": 5
          }
        ]
      }
    ]
  }
}
Exit Codes: Exit code 0 allows execution; exit code 2 blocks tool execution automatically.
Enforcing Permission Guardrails
Restricting file access and command execution prevents destructive actions:
{
  "permissions": {
    "allow": [
      "Read:*",
      "Bash:git:*",
      "Write:*:*.md"
    ],
    "deny": [
      "Read:env:*",
      "Bash:sudo:*"
    ]
  }
}
Step 5: Daily Terminal Workflow Pattern
Adopt this step-by-step developer loop for smooth, interactive pairing:
1. Start Session     : cd project && claude
2. Enter Plan Mode   : Shift + Tab + Tab  --> Outline feature logic
3. Describe Intent   : "Refactor auth middleware to support JWT refresh tokens"
4. Enable Auto-Accept: Shift + Tab        --> Execute planned edits
5. Compress Context  : /compact           --> Save token memory
6. Rewind if Needed  : Esc Esc            --> Roll back unintended steps
7. Commit & Reset    : Git commit & start fresh session per feature
Quick Reference Commands
| Command / Key | Function & Usage |
| /init | Scans repository and generates starter CLAUDE.md |
| /doccat | Validates active configuration and tool installations |
| /compact | Summarizes session history to free up context tokens |
| Shift + Tab | Cycles between Execution modes (Plan / Auto-Accept) |
| Tab | Toggles Extended Thinking mode on or off |
| Esc Esc | Opens the rewind menu to undo recent tool steps |
Best Practices Checklist
- Run /init First: Always initialize your repository before starting large refactoring tasks.
- Reference Docs with @: Direct Claude to specific context files using @filename syntax (e.g., @docs/architecture.md).
- Keep Memory Files Concise: Restrict CLAUDE.md to essential build rules, keeping file lengths under 200 lines.
- Isolate Feature Sessions: Exit and restart claude between distinct feature tasks to keep the context window fresh.
- Commit Configuration to Git: Store .claude/skills/ and .claude/settings.json in version control so your entire engineering team shares identical AI behavior.
Getting Started
To upgrade your agentic development workflow, install Claude Code, run claude /init inside your project root, set up your first skill in .claude/skills/code-review/SKILL.md, and experience context-aware AI software engineering directly from your terminal!